Manage assets in Jira is an essential part of any organization, as it helps to ensure that critical assets are being used effectively and efficiently. However, managing assets can be a complex and time-consuming task, especially when you have a large number of assets to keep track of. That’s why many organizations are turning to AssetIT, a powerful asset management tool that integrates with Jira. In this guide, we will explore how to manage assets on AssetIT and master asset management in Jira.
1. Why you need to use AssetIT for Asset Management in Jira
There are several reasons why you need to use AssetIT for asset management in Jira. First, AssetIT allows you to easily track and maintain all of your assets in one central location. This makes it easy to see the status of each asset, such as how many are in use, how many are in storage, and how many have been retired. Additionally, AssetIT allows you to easily collaborate with team members, so everyone can stay informed about the assets they are responsible for.
Another benefit of using AssetIT is the ability to generate reports. With AssetIT, you can easily create reports that show the status of your assets, including how many are in use, how many are in storage, and how many have been retired. This can help you to identify trends and make decisions about how to best manage your assets.
Finally, AssetIT integrates seamlessly with Jira, allowing you to link assets to Jira issues. This makes it easy to see the status of assets in the context of your projects and tasks, which can help you to manage assets more effectively.
2. How to manage assets on AssetIT
In this section, we will discuss how to manage assets on AssetIT, including how to create new assets, edit existing assets, check in and check out assets, and link assets to Jira issues.
What is an Asset in AssetIT?
An Asset in AssetIT is any physical device, data or other components that supports information-related activities. An Asset is associated with an Asset Tag which is unique and will be used to generate a barcode or QR code, so that you can scan it to check the location and information of that Asset.
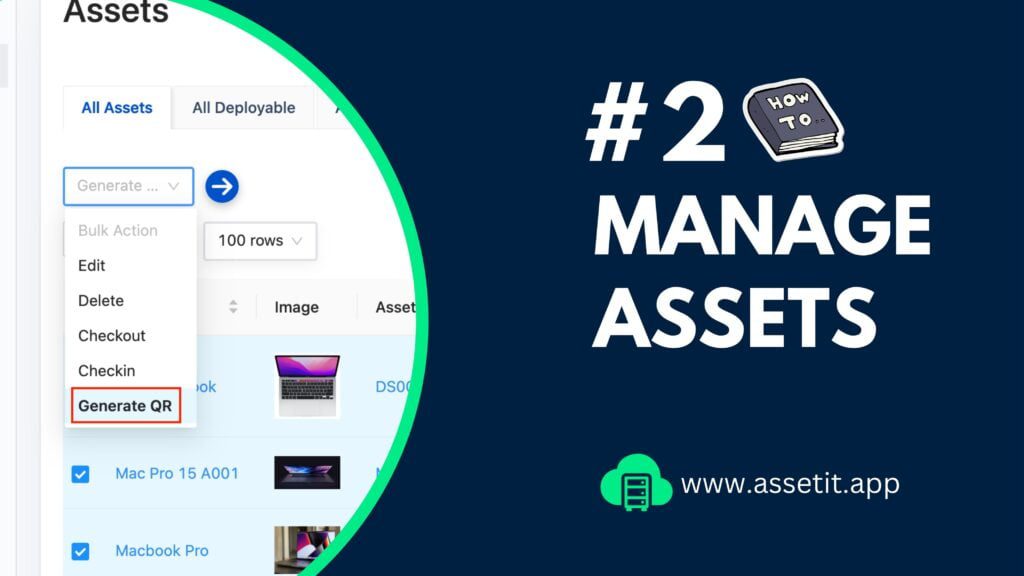
You can navigate to All Assets by going to Assets menu item

How to create new assets?
To create a new asset in AssetIT, you will need to log in to the AssetIT web app. Once finish, you can click on the “Assets” button in the top navigation bar. In the Assets screen, click on “Create New” button to navigate to Create New Asset screen

In Create New Asset screen, input all Asset related properties and information.
All the fields with red star-prefixed are mandatory
You can also click on New buttons for shortcut creation

Finally, click on “Submit” button to save the Asset
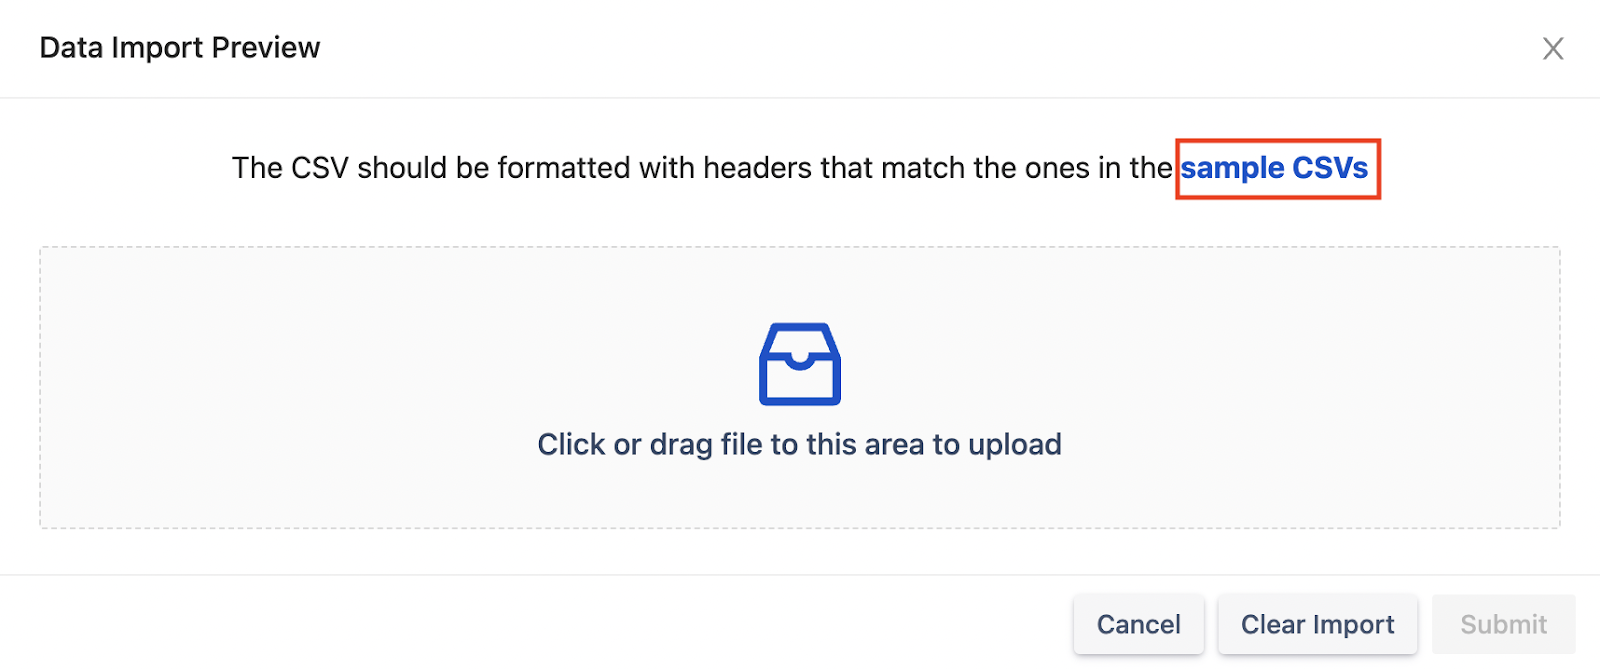
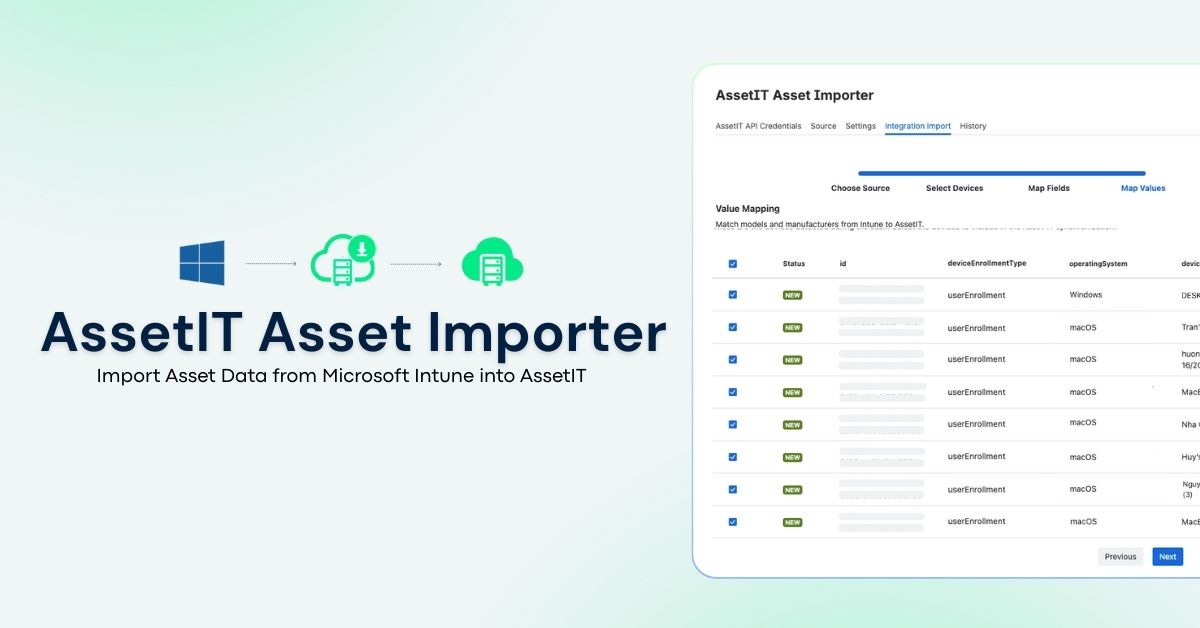
Or you can import Assets from a CSV file
AssetIT support users to import their assets from a CSV file. You can download the sample CSV file format from the import dialog
How to edit an asset?
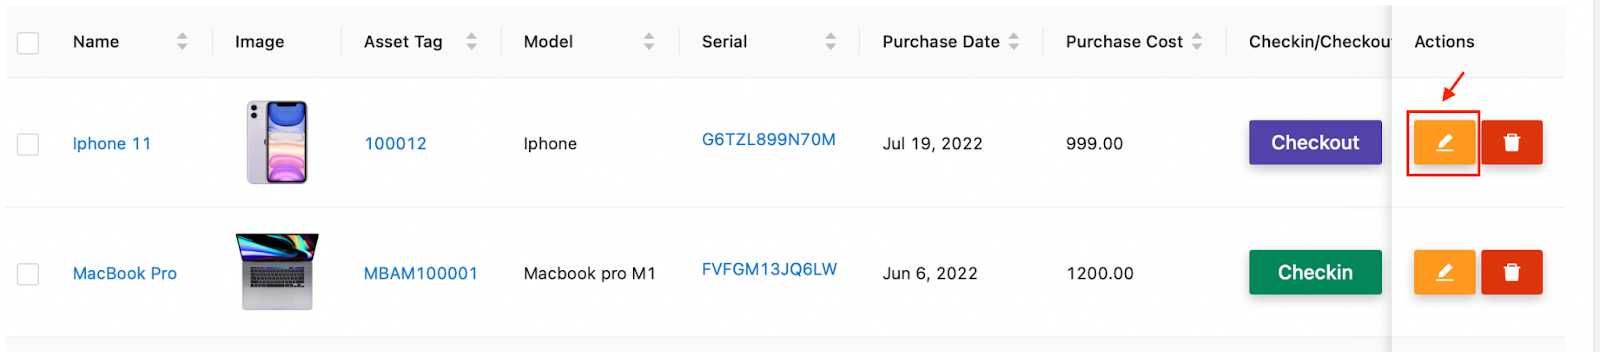
In the Assets screen, click on Edit button to update a specific asset
Edit an Asset is similar to Create, ensure that you have filled all the mandatory fields and then click on Submit to save your update

How to check in and check out assets?
When you checkout an asset, license or accessory, you’re marking them as being in the possession of someone else. This means that they cannot subsequently be checked out to another person until they are checked back in. This prevents “double-booking” assets, where one asset has been promised to or assigned to multiple people.
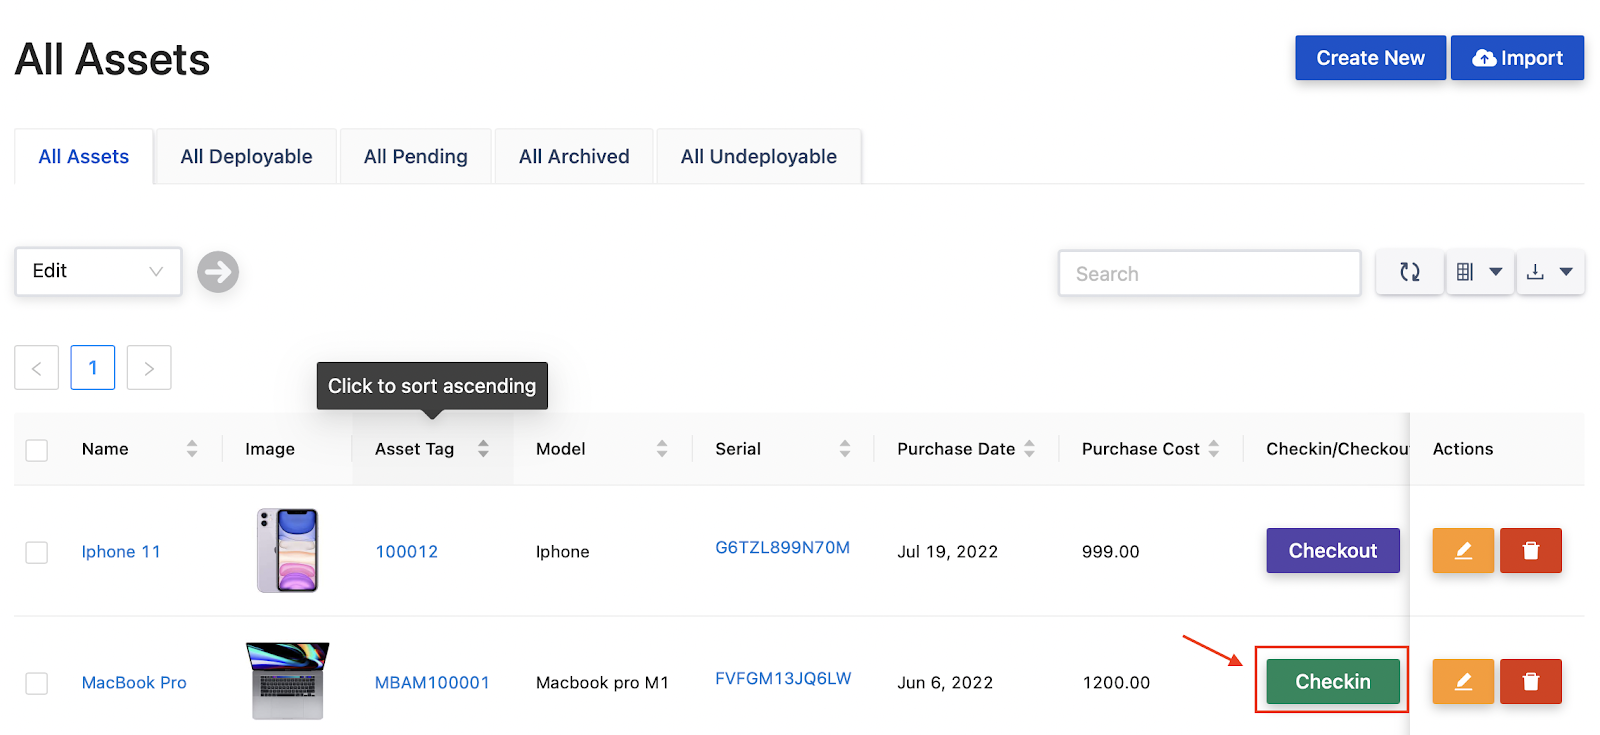
- Checkout an Asset
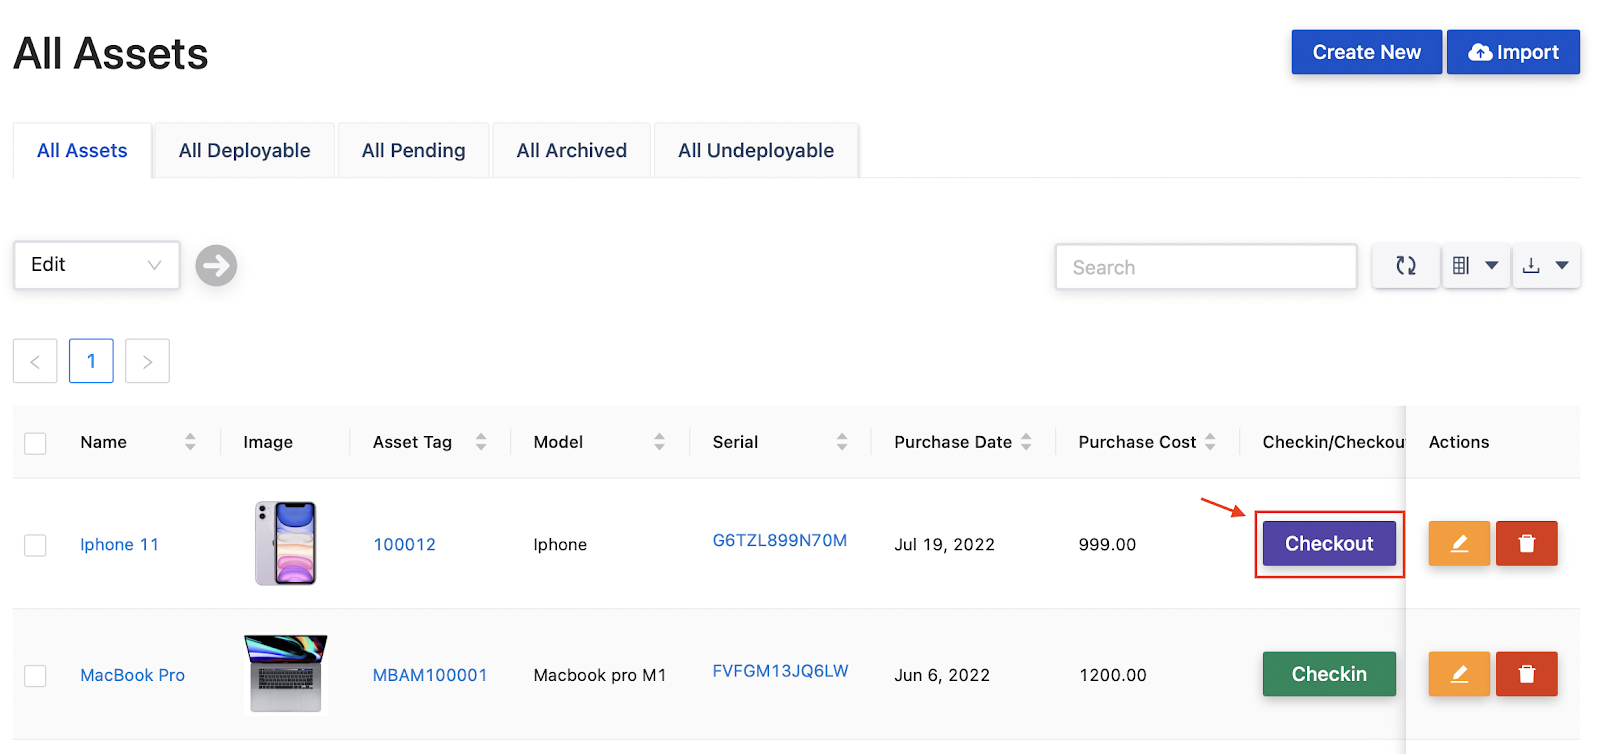
From Assets screen, in Checkin/Checkout column, click on Checkout button
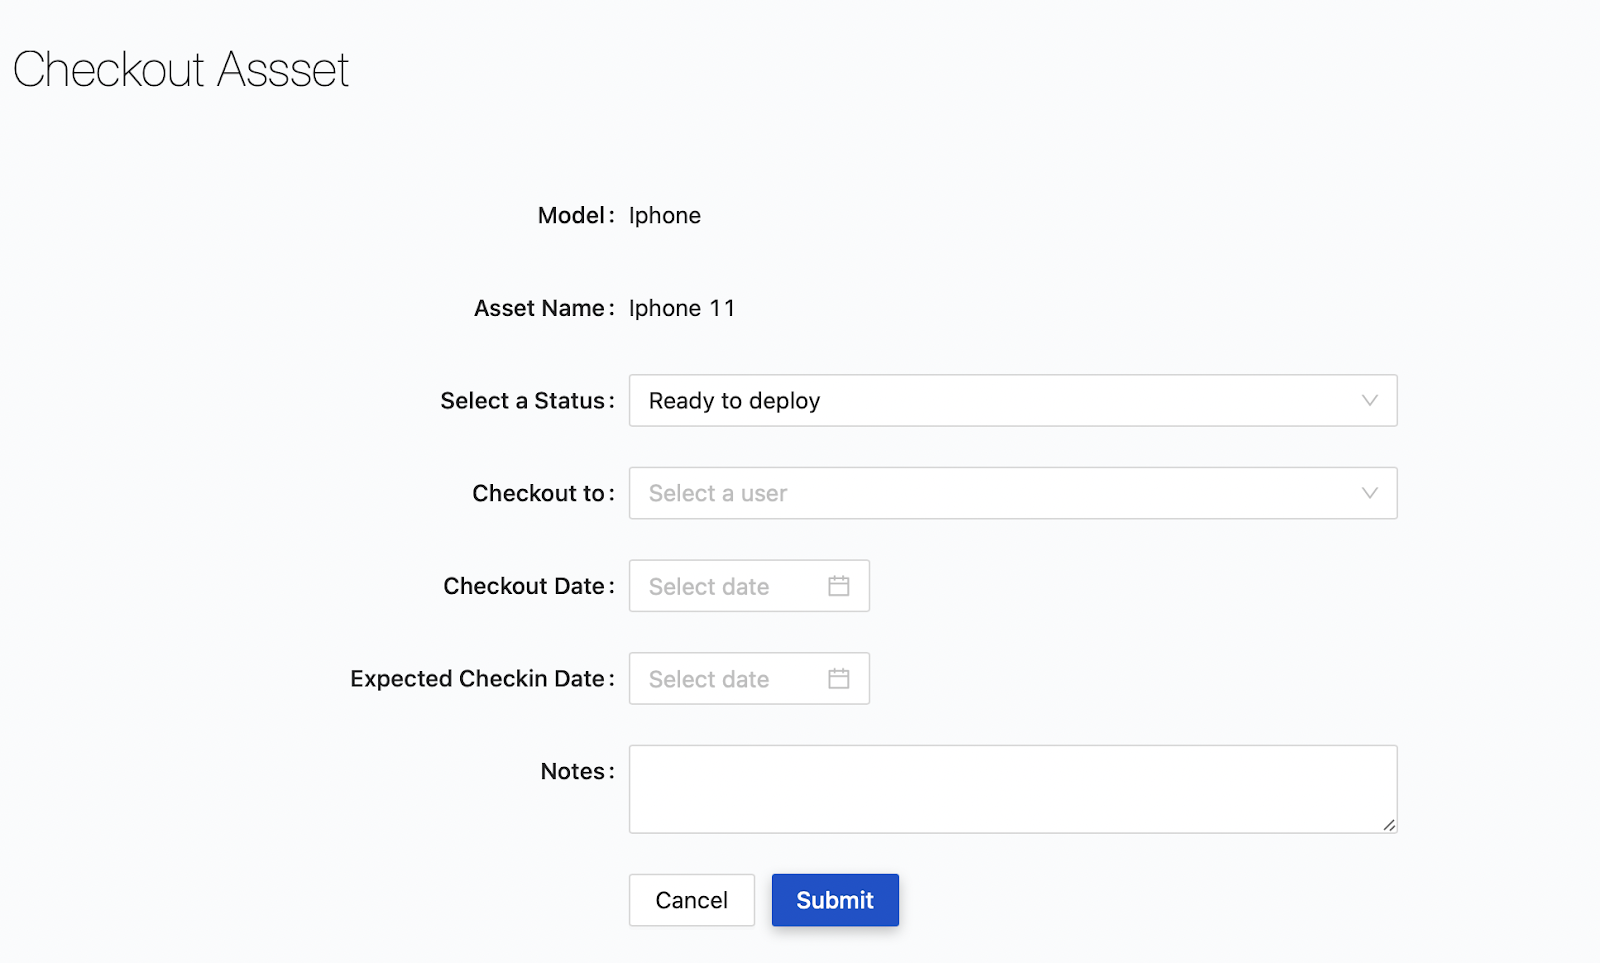
It will lead to the Checkout Asset screen.
Fill in all necessary information, assign the selected asset to a user. You can also update the Asset status from here.
Click on Submit to checkout the asset
- Checkin an Asset
From All Assets screen, in Checkin/Checkout column, click on Checkin button
Similarly, it will navigate you to Checkin Asset screen.
Fill in all necessary information and click on Submit to checkin the asset.

How to link assets to a Jira issue?
From the version 1.1.0-AC AssetIT supports linking assets to Jira issue.
You need to have Asset custom field and already configured the field on Issue Screens.
Please follow this guide to add Asset field to Jira project
For company-managed project add-additional-asset-fields
For team-managed project link-an-asset-to-a-request-in-team-managed-projects
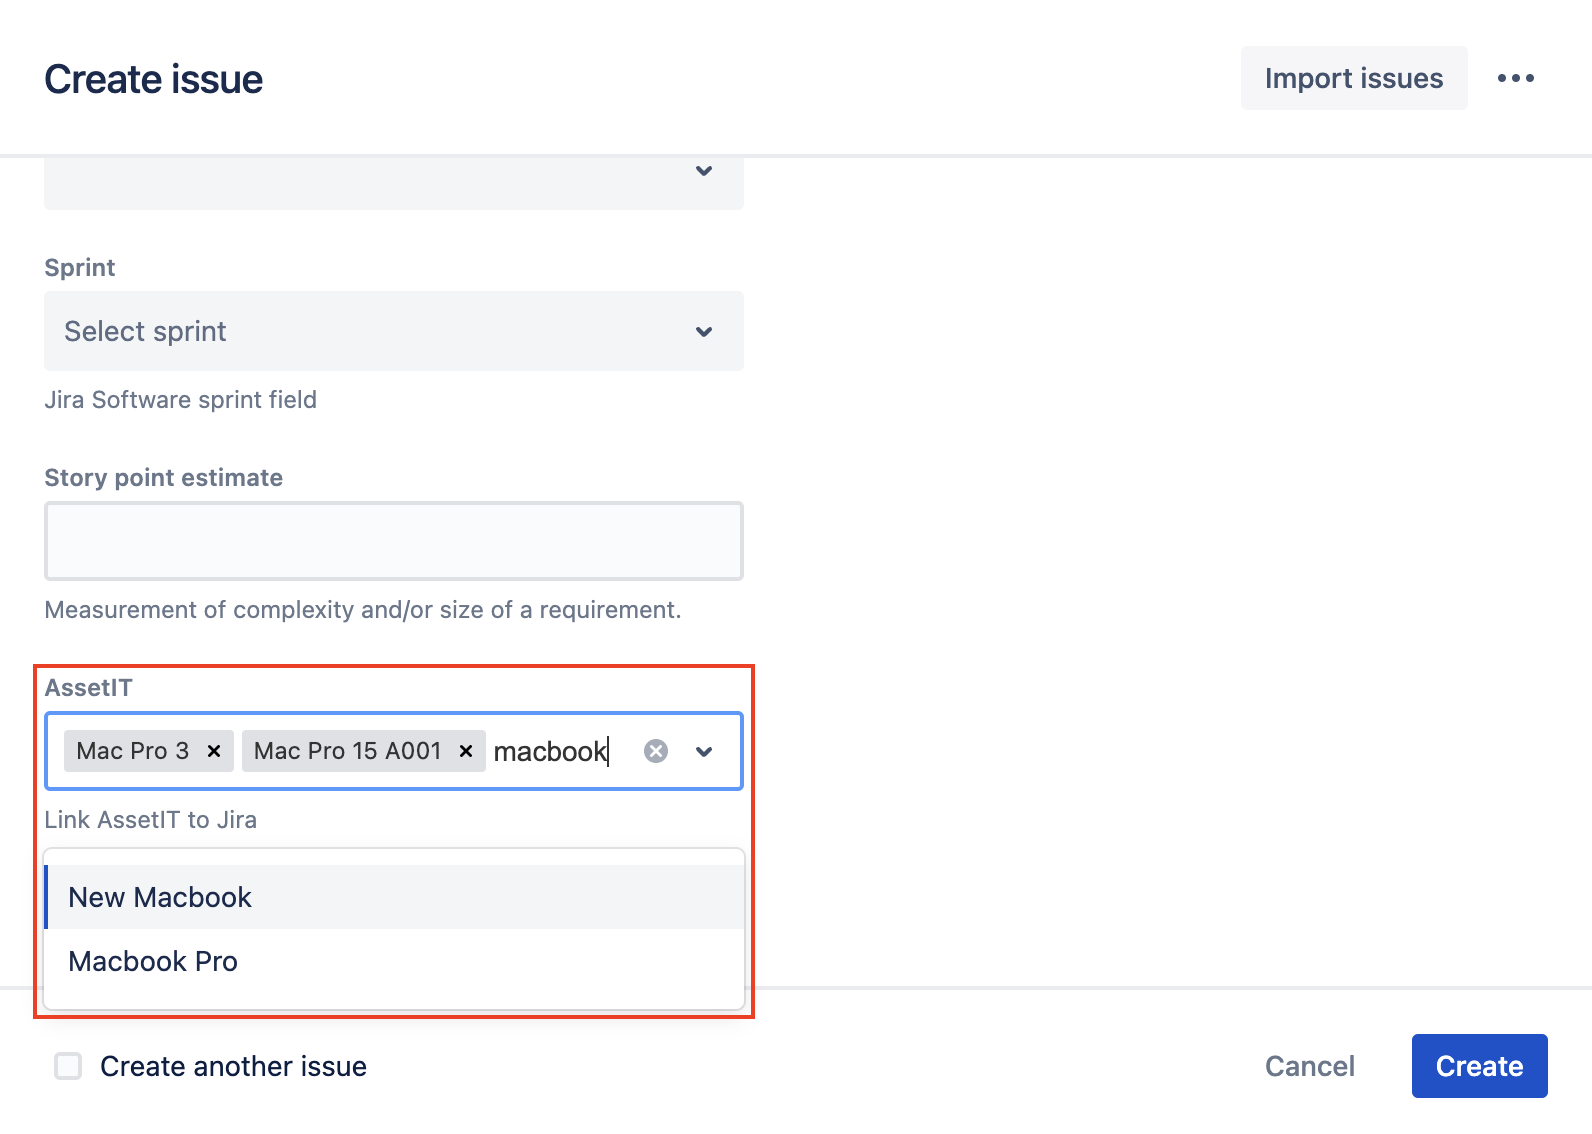
Once you have the Asset field, you can open it from Create Issue dialog or on the right panel of the issue details screen
From Create Issue
From the Asset field, search and select one or multiple assets by names
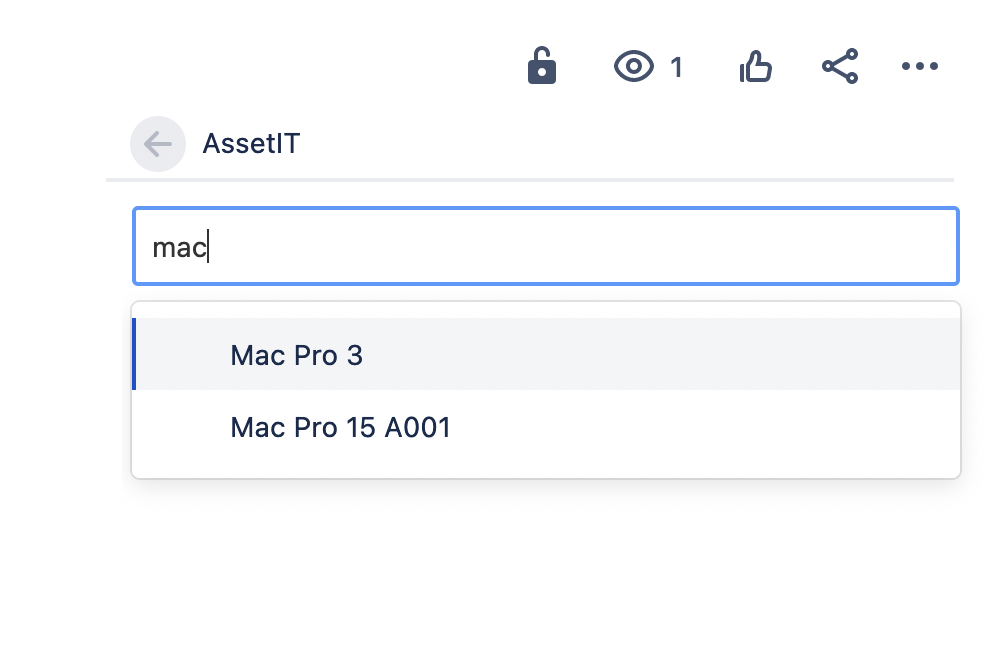
On the right panel

Click on Link asset to open the panel, search for asset by name and add into the issue

In summary, Asset Management in Jira is a powerful tool for tracking, maintaining, and reporting on the status of assets within your organization. With AssetIT, you can collaborate with team members, generate reports, and manage the lifecycle of your assets effectively.
Check out Asset management for Jira pricing


Recent Comments