
Managing Jira permissions as an admin is crucial for ensuring your team’s productivity and data security. With Jira permissions, you control what users can see and do within projects, from creating issues to assigning tasks. You are new to Jira? No worries, let me take you through what Jira admin is in “Everything You Need to Know about Being a Jira Administrator.”
This article will explore the definition of Jira permissions and their types. It will include global, project-level, and issue security permissions. You’ll learn how to set up Jira admin permissions and manage Jira permissions effectively. As a result, it will empower your team while safeguarding sensitive information.
Understanding Jira Permissions
Jira has a robust permission system that ensures the right users have appropriate access and capabilities within the platform. Let’s explore it in more detail:
Jira Permissions Definition
Jira permissions are settings that determine what users can view and perform within the system. These permissions range widely across Jira applications, controlling aspects such as the ability to create new projects or view specific types of comments on issues. The permissions can vary from one application to another.
Types of Jira Permissions
In Jira, permissions are classified into three types, ranging from high-level to granular:
- Global Permissions: These apply to the entire Jira instance, controlling system-wide actions like whether users can see other users in the application.
- Project Permissions: Organized into permission schemes. These permissions dictate what users can do within a project, such as viewing issues, creating, editing, and assigning them.
- Issue Security Permissions: Organized into security schemes. These allow adjusting the visibility of issues (within the bounds of the project’s permissions).
Who can set Jira permissions?
Users with specific administrative roles manage Jira permissions. Here’s a breakdown of who can set different types of permissions in Jira:
- Global Permissions
Global permissions, which apply across the entire Jira instance, can be set by:
- A user with Jira System Administrator permission.
- A user who is part of a group with Admin access.
2. Project Permissions
Project permissions, which control what users can do within specific projects, can be set by:
- A user with Jira System Administrator permission.
- A user who is part of a group with Admin access.
3. Issue Security Permissions
Issue security permissions, which determine who can view specific issues, can be set by:
- A user with Jira System Administrator permission.
- A user who is part of a group with Admin access.
- A project administrator.
These permissions ensure that only authorized users can manage access and control within Jira, maintaining the security and integrity of the project data.

Understanding Jira Permission Scheme
Every project in Jira has a permission scheme associated with it. One permission scheme can be assigned to multiple projects, preventing the need to set up permissions individually for each project. Permission schemes are crucial for organizations where multiple projects have similar access rights requirements, such as allowing only the designated project team to work on issues.
What is Permission Scheme?
A Jira permission scheme is a collection of permissions that can be applied to one or more projects. It defines the set of permissions (project, issue, workflow, etc.) and specifies which users or groups are granted each permission. Essentially, a permission scheme is a template that can be used to apply consistent permission settings across multiple projects.
How Do Jira Permissions and Schemes Work Together?
When you set up a project in Jira, you assign a permission scheme to that project. The permissions defined in the scheme determine what users can do within that project. For example, a permission scheme might specify that only project administrators can manage sprints, while all team members can view and edit issues.
In other words:
- Permissions:
- Browse Projects: Allows users to view the project and its issues.
- Manage Sprints: Enables users to create and manage sprints in Agile boards.
- Edit Issues: Permits users to modify issue details.
- Permission Scheme:
- Scheme Name: “Development Team Scheme”
- Browse Projects: Granted to the “Developers” group.
- Manage Sprints: Granted to the “Project Administrators” group.
- Edit Issues: Granted to the “Developers” group and the “Testers” group.
When the “Development Team Scheme” is assigned to a project, it means that:
- All members of the “Developers” group can browse the project and edit issues.
- Only members of the “Project Administrators” group can manage sprints.
Factors to Consider When Creating a Permission Scheme
When creating a permission scheme, consider the following factors:
- Project Roles: Jira allows you to associate users and groups with specific project roles, providing a flexible way to manage permissions based on functions and projects.
- Dependency of Permissions: Some permissions depend on others to ensure users can perform necessary actions. For example, to edit issues, users must first have the permission to browse the project.
- Product Access: Certain project permissions require users to have access to the corresponding Atlassian product, such as Jira or Jira Service Management.
By understanding and effectively managing permission schemes, you can empower your team while safeguarding sensitive information. Therefore, you can ensure a secure and productive Jira environment.
Managing Jira Permissions and Permission Schemes
To manage Jira Permissions, you will need to identify what types of permissions you would like to configure.
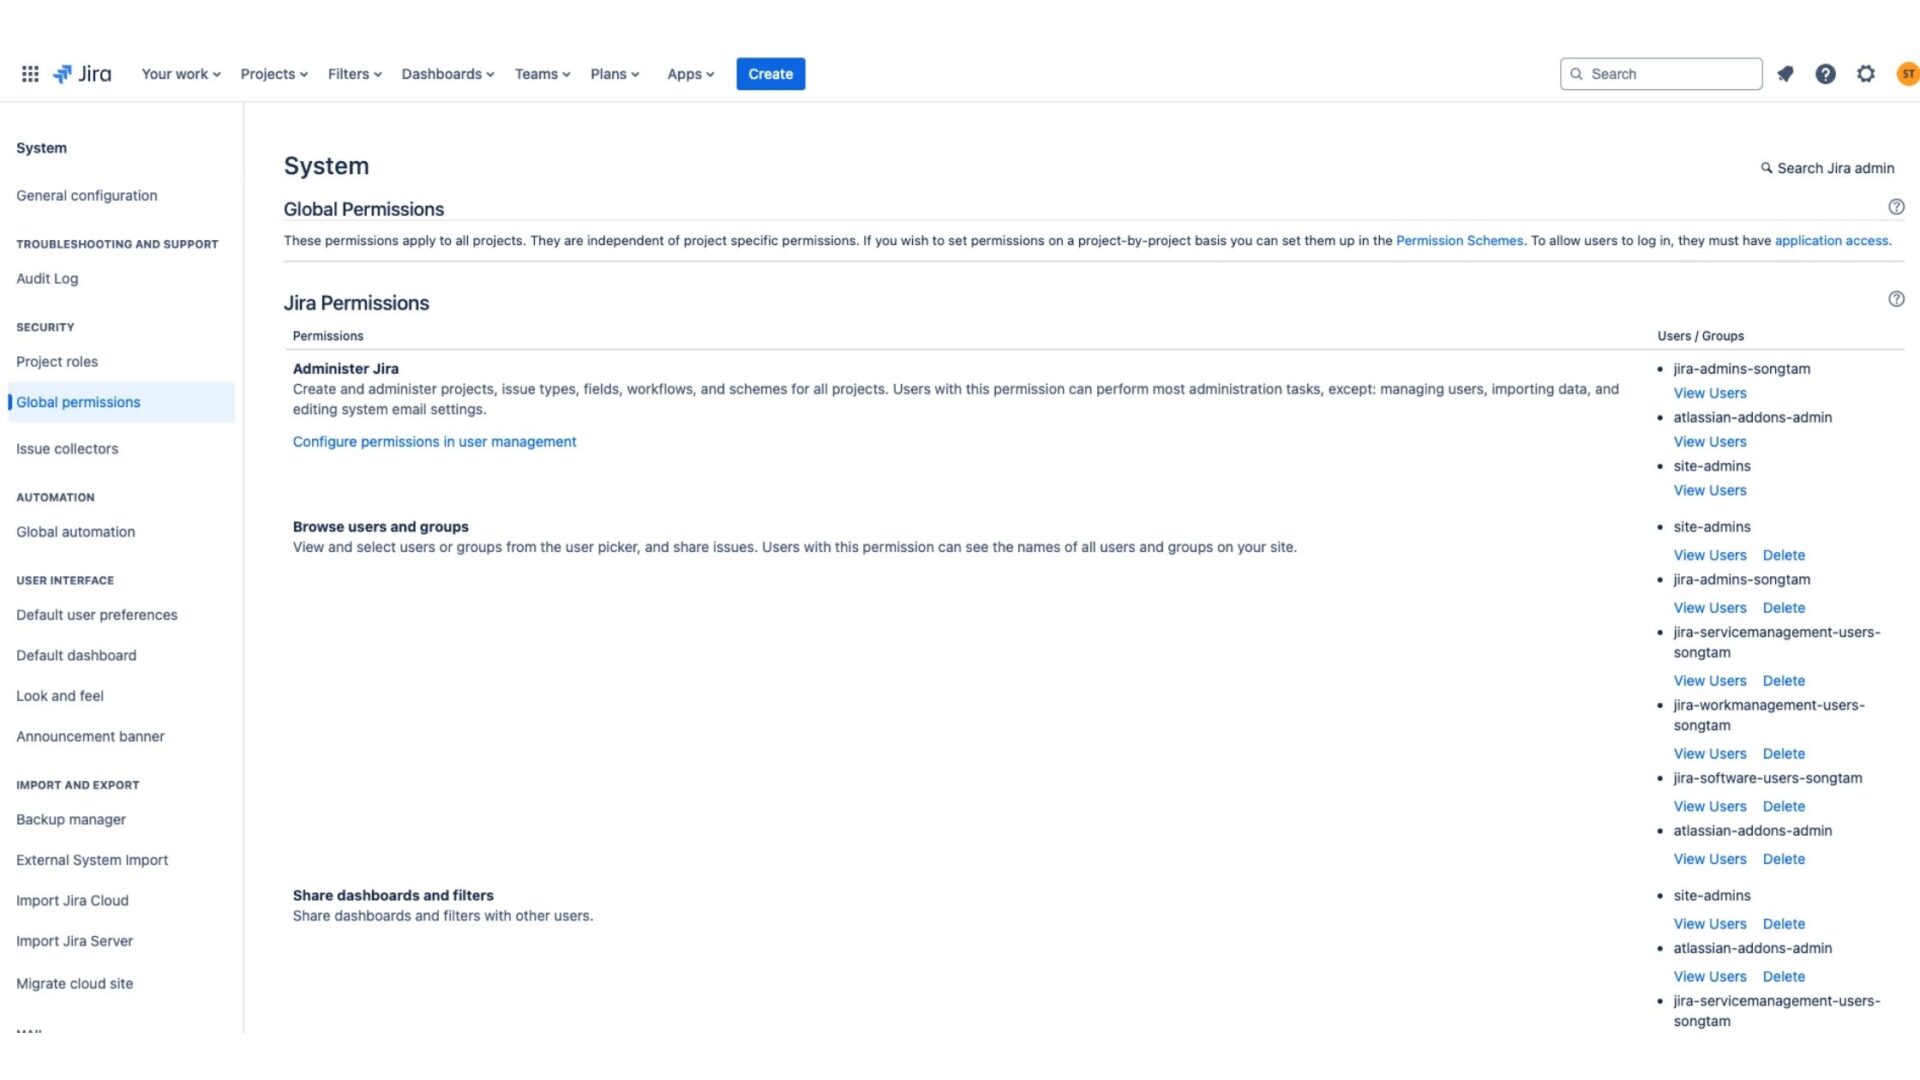
Jira Global Permissions:
- To manage global permissions in Jira, go to the Settings icon > System and select Global Permissions from the left sidebar.
- At this point, you will see a list of permissions along with explanations for how to manage them.
- Scroll down to see the dropdown options, which include user permissions and groups. To grant permissions, select the appropriate permissions for the desired user groups.
For more detailed information, visit Manage global permissions by Atlassian.
Project Permissions:
Jira admins can manage project permissions in two ways:
- For company-managed projects: Jira administrators handle project permissions using permission schemes.
- For team-managed projects: Project administrators manage permissions using custom roles.
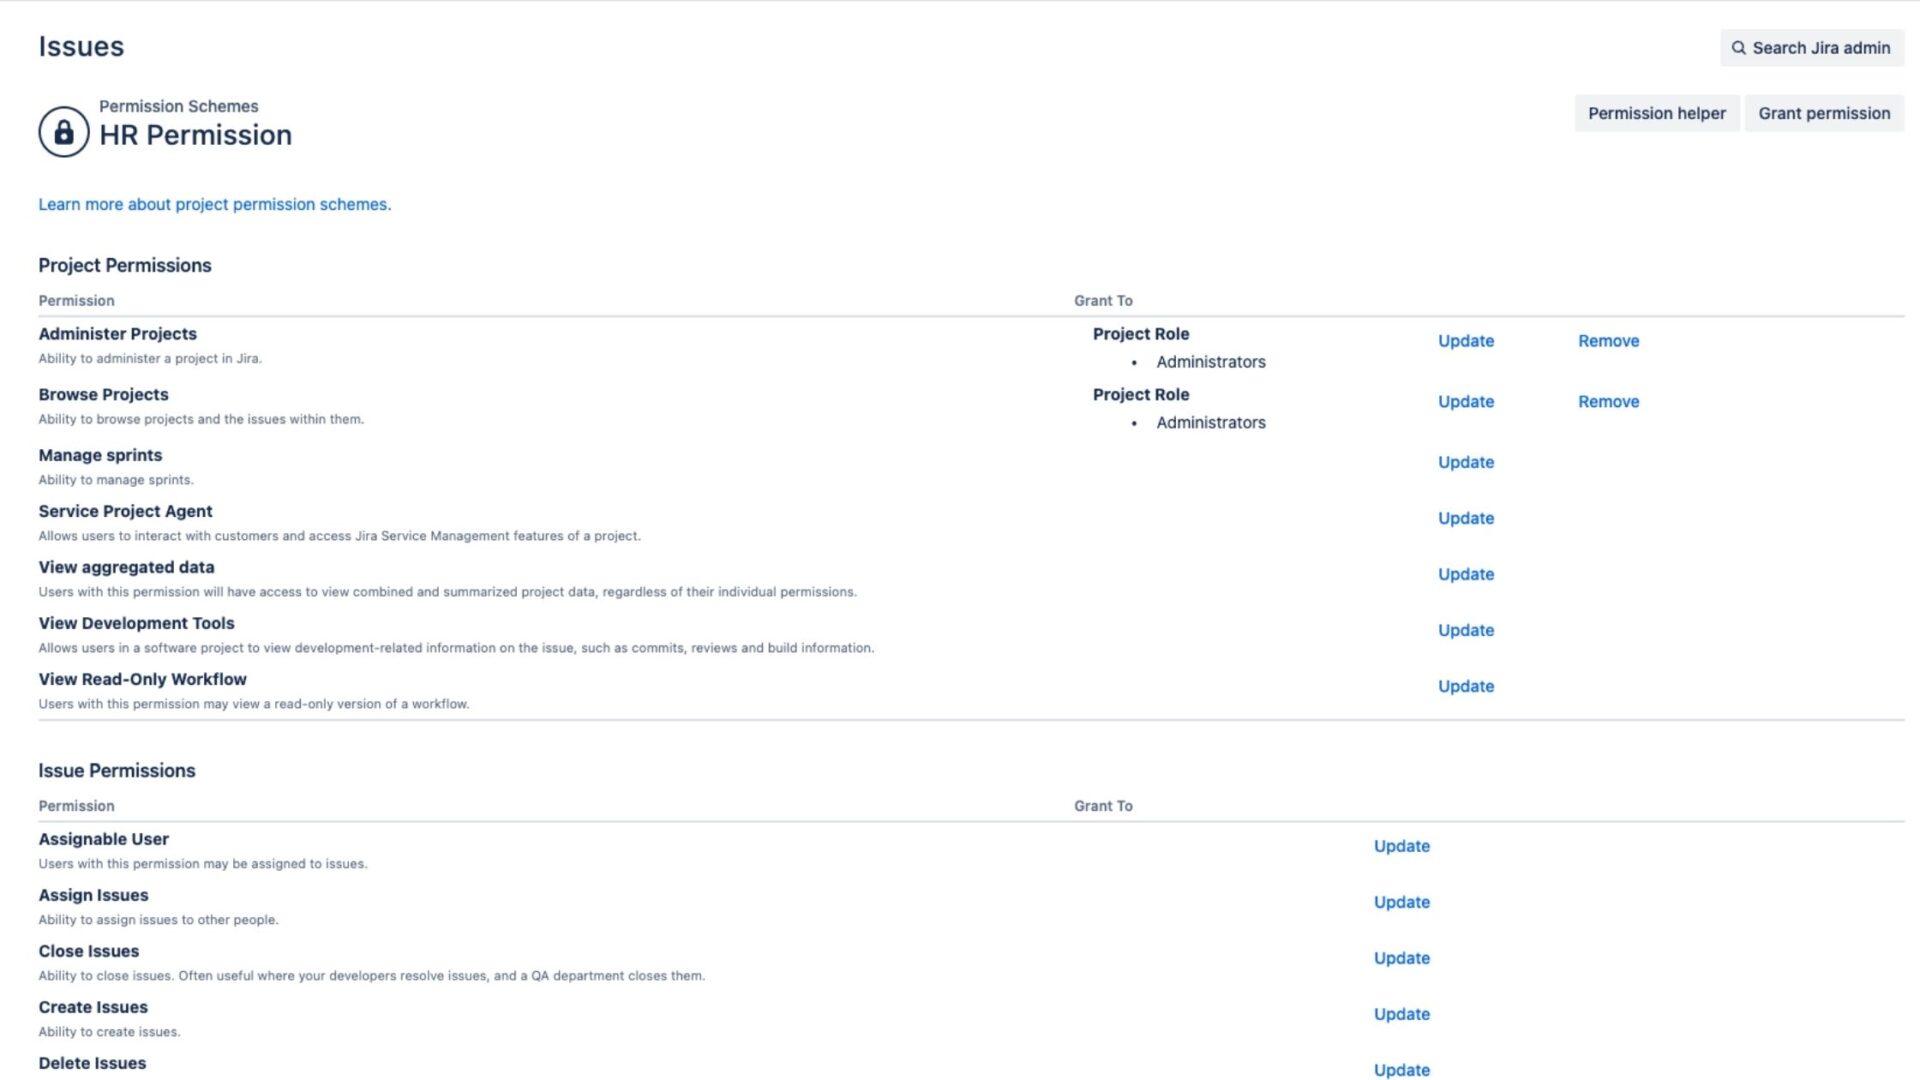
To create a permission scheme in Jira:
- Click on the Settings icon > Issues.
- From the sidebar, select Permission Schemes. This will open the Permission Schemes page, showing all the permission schemes on your Jira site and the projects using each scheme.
- Click Add Permission Scheme. This will open the Add Permission Scheme form.
- Name your new scheme and provide a short description. Descriptions help you identify schemes later.
- Click Add.
Your new scheme will appear on the Permission Schemes page, but it will be empty. To use the scheme, you need to:
- Add users, groups, and roles to the scheme and assign their project permissions.
- Associate the scheme with the projects that should be used with it.
For more detailed information, visit Manage project permissions by Atlassian.
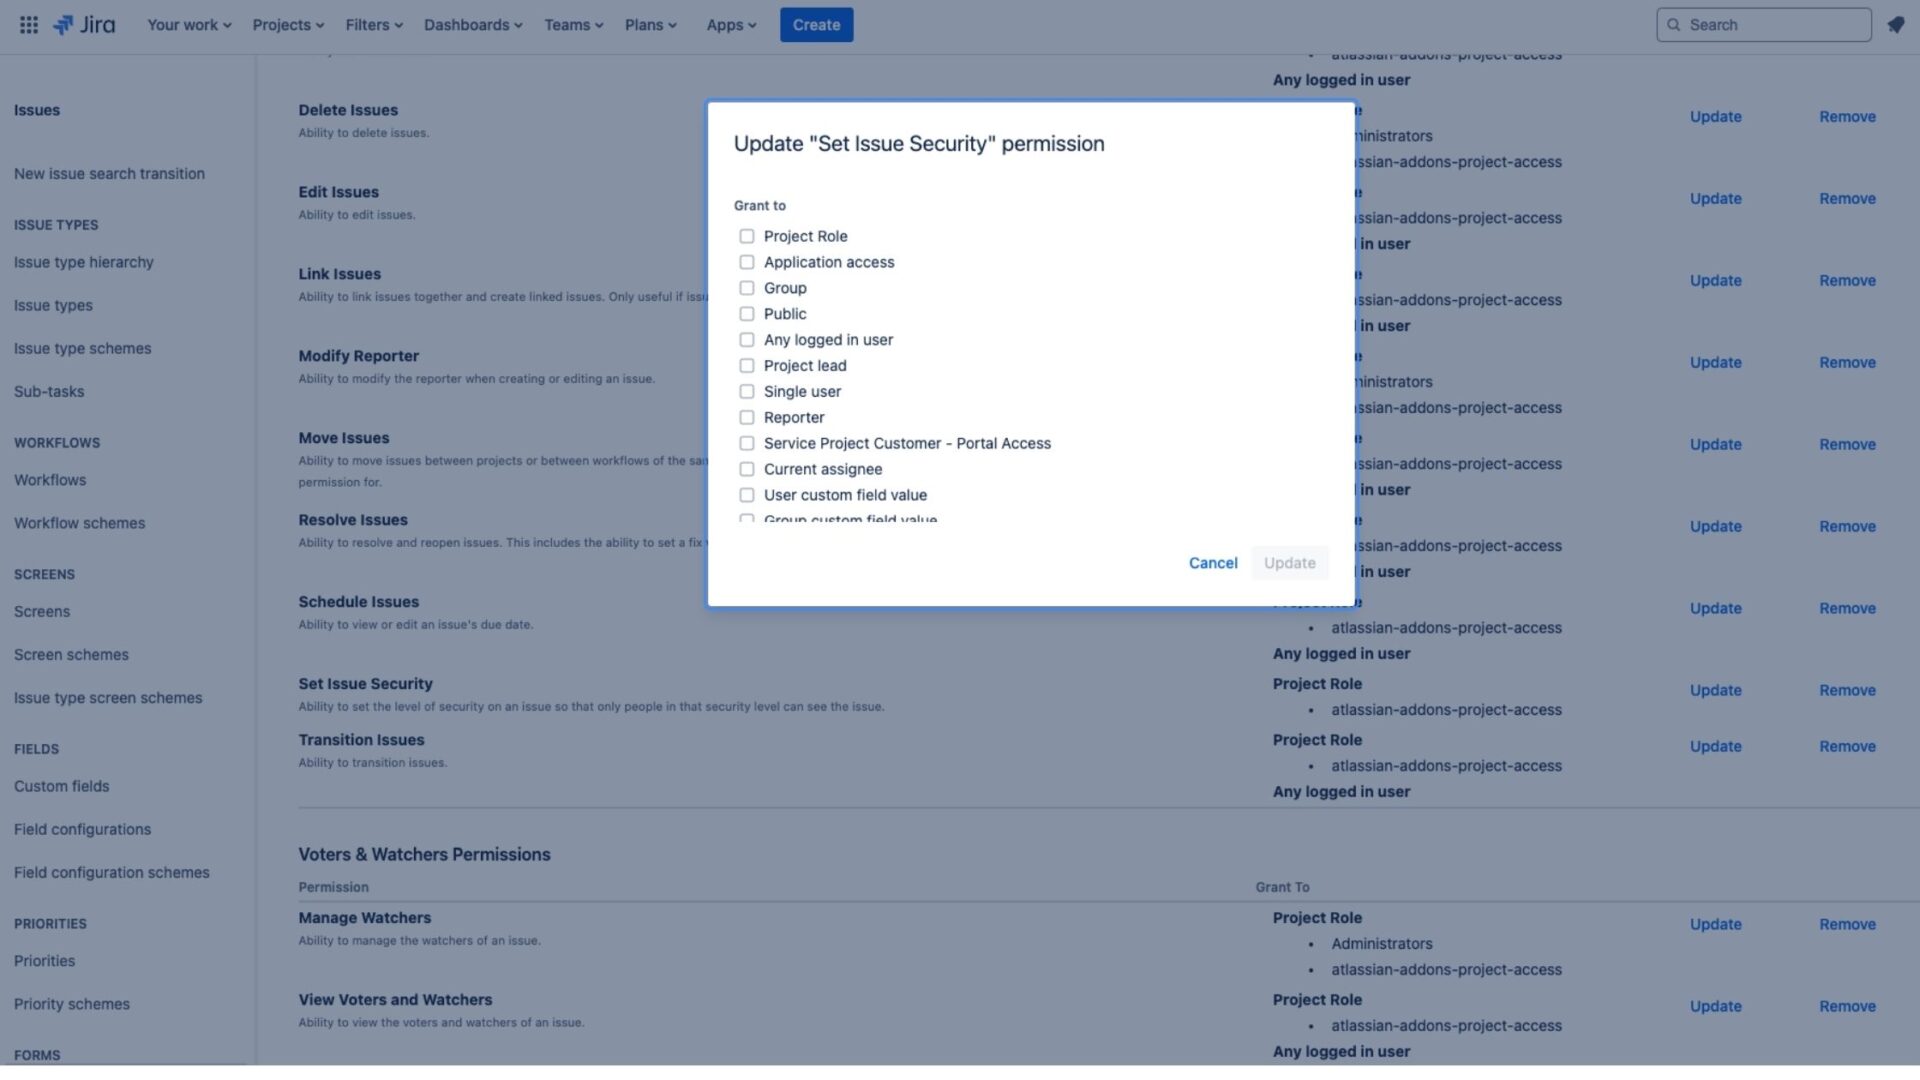
Issue Security Permissions:
You can create issue security levels within issue security schemes to control who can see specific issues. When you link an issue security scheme to a project, its security levels can be applied to issues in that project. Subtasks automatically inherit the security level of their parent issue.
To configure issue security schemes in Jira:
- Create an issue security scheme: Go to Issues > Issue security schemes > Add Issue Security Scheme, fill in the details, and click Add.
- Add a security level: Select the scheme and click Security Levels > Add Security Level.
- Set the default security level: Choose a security level and set it as default.
- Add members to a security level: Select users, groups, or roles to add.
- Assign the scheme to a project: Go to Project Settings > Issue Security > Select a scheme.
For more details, visit the Atlassian document at Configure issue security schemes.
Jira Permissions in Use Case
An organization uses AssetIT, which is integrated with Jira, to better manage projects. Each Jira issue will include a device to ensure that everyone understands what they are responsible for. As a result, there’s a need to restrict normal users to only viewing projects and issues without the ability to configure or modify them. This protects sensitive configurations and settings while keeping users informed about project progress.
This is how they set everything up:
1.In Jira
- Define Permission Scheme:
- Create a scheme named: “Read-Only Access Scheme”
- Browse Projects: Granted to the “Normal Users” group.
- View Issues: Granted to the “Normal Users” group.
- Configure Projects: Granted to the “Administrators” group.
- Manage Sprints: Granted to the “Administrators” group.
- Edit Issues: Granted to the “Administrators” group.
- Assign Users to Roles:
- Normal Users: Assigned to the “Normal Users” group.
- Administrators: Assigned to the “Administrators” group.
2. In AssetIT
- Create a scheme in AssetIT permission
- Choose Inventories (if any)
- Enable “View Assigned Only” in Assets permission settings to ensure that users can only view assets assigned to them.
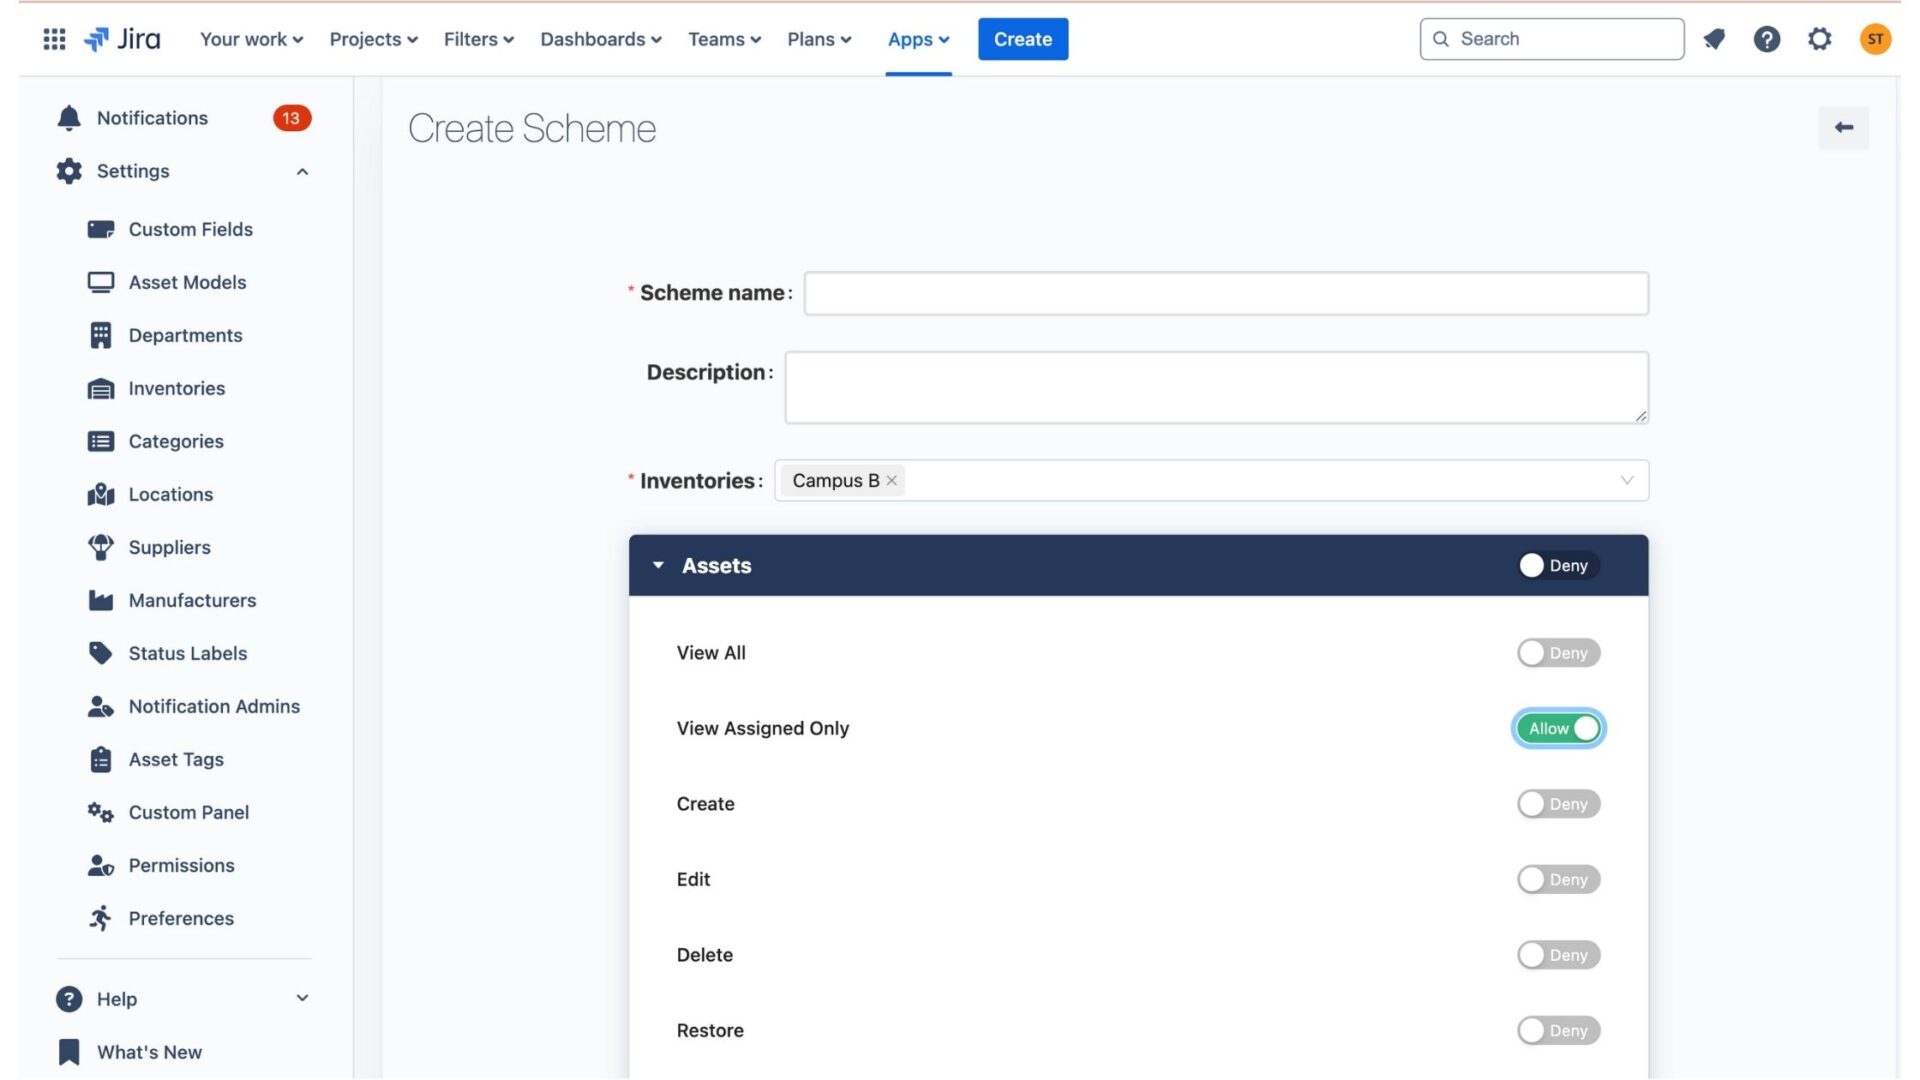
- Click “Save”
- Assign appropriate Jira users or user groups to the scheme.

- Click “Save” to finish.
Conclusion
Managing permissions in Jira is a critical aspect of ensuring productivity and security for your organization. By understanding the different types of permissions and how to create and manage permission schemes, you can effectively control access and actions within your projects. Granting appropriate permissions to users, groups, and roles allows you to empower your team while safeguarding sensitive information.
Remember, successfully implementing Jira permissions is an ongoing process that requires regular review and adjustment as your team’s needs evolve. Stay vigilant and proactive in managing permissions to maintain a secure and efficient Jira environment, fostering collaboration while protecting your organization’s valuable data and workflows.


Recent Comments